
Sunday, November 7, 2010
Day 2 of the Thanksgiving Blog Hop!
This post has been removed because my project is going to be published in the Nov. issue of Cricut Magazine!!!!

Saturday, November 6, 2010
2-Day Thanksgiving Blog Hop!!
This is my first time participating in a Blog Hop! You should have arrived at my blog from Time2Create and your next stop on the blog hop is Scrappidy Ashy. Have fun looking at all the incredible cricut creations! Remember to stop by tomorrow for another day of fantastic cricut creations!
Here is my first item for the 2 day blog hop! (Click on the picture to see it larger.)

It's a turkey placemat for the kids table...along with a tag for the kids to write (or draw!) what they are thankful for! The tag serves two purposes...it's a way to keep the kids busy as the thanksgiving dinner is getting ready to be served...and...it can be added to a scrapbook layout later!
The turkey is made using the Create A Critter cartridge, cut at 9 inches. I used a circle punch to cut the white and black for the cartoonish eyes! I also gathered some leaves from our trees (it's just becoming Fall here) and used them as additional colored feathers along with attaching one to the tag with button.
Thanks for stopping by on the blog hop! Your next stop is HERE.
Here is my first item for the 2 day blog hop! (Click on the picture to see it larger.)

It's a turkey placemat for the kids table...along with a tag for the kids to write (or draw!) what they are thankful for! The tag serves two purposes...it's a way to keep the kids busy as the thanksgiving dinner is getting ready to be served...and...it can be added to a scrapbook layout later!
The turkey is made using the Create A Critter cartridge, cut at 9 inches. I used a circle punch to cut the white and black for the cartoonish eyes! I also gathered some leaves from our trees (it's just becoming Fall here) and used them as additional colored feathers along with attaching one to the tag with button.
Thanks for stopping by on the blog hop! Your next stop is HERE.
Friday, November 5, 2010
Christmas Sock Cupcakes!

I had saved a bunch of the Spa Socks from Michael's over the summer to make up some Christmas Sock Cupcakes. My plan was to make a bunch for a craft fair we're having at work. But as the craft fair got closer...I realized I didn't have the time to participate (too much going on) so I thought I was going to be stuck with a whole bunch of socks! I made up these 3 sock cupcakes and brought them to work and within minutes had orders for every pair of socks I had...plus more if I can find them!
To make these, I used the cupcake wrapper on the Easter cricut cartridge (3 of them fit on a 12x12 mat). I also used my gypsy to use the Hide Contour feature to remove the little holes in the scallop top of the cupcake wrapper...it allows the wrappers to cut faster and there's less chance of ripping as it tries to cut those little tiny holes. (Tip: do the hide contour on one wrapper and then copy that one for the other two. That way you only have to hide all those holes one time!)
Wednesday, November 3, 2010
Halloween Luminaries...So Easy!!

These were super easy to make! I used the Happy Hauntings and October 31st cricut cartridges for them. The shapes were cut at 5 1/2 inches out of a dark colored cardstock. Adhere the shapes to the insides of some inexpensive lunch bags. You'll want to use a dry adhesive (double sided tape works great) so that it doesn't bleed through the lunch bags.
I placed a rock in the bottom of the lunch bags and then placed 2 battery tea lights on top of the rocks. Super easy!!

Friday, October 29, 2010
Monthly Contest Entry - Create!

On the Cricut Circle blog they're having a monthly contest along with weekly contests. The monthly contest for October was to make something inspired by the word CREATE. I made a layout to remind myself to Think Creatively!
For the layout I used the Stamping cartridge for the butterflies (the butterfly shadow only), Street Sign is used for the font for Think, and Songbird is used for Creatively. I used my gypsy to weld the letters and shadow letters together for Creatively. I used my iRock for the pearls on the letters and black butterflies. (Click on the pictures to see them larger.)

Thanks for looking at my latest creation!
Tuesday, October 12, 2010
Think Pink Contest Entry!
The weekly contest on the cricut circle for this week is to make a Think Pink entry. In addition to having at least 2 cuts...you also needed 3 of the following: Some Pink, Scallops, Ruffles, Flourishes, Glitter and Jewels!
For my entry...I made my own Lace Cardstock incorporating the title into the design...and then used the Cricut Markers to highlight the title before I cut it out! I used the following cricut cartridges: George and Basic Shapes (for the hearts and some of the letters), Printing Press (more letters) and Storybook (scallop rectangle).

To make the lace cardstock I used my gypsy to lay out the design, welding all the letters together. (It uses up a lot of memory to do this so it takes a little while to compile before cutting.) I saved the completed page as one design. Then, I opened the design again and deleted all the letters that weren't part of the title.

I then did a 'save as' and made this a separate file. This is the file I used first with the cricut markers ONLY...don't cut this version. When the markers finish, don't unload the mat, just replace the blade housing exactly where it is (Tip: I place a small piece of paper, like a post it note, under the marker tip when I'm taking out the marker just in case I drop it on my paper! I don't want the marker to mark up my good paper.)...once the blade housing is in place, on the gypsy select 'return to design'. From here you can open the second file, the one with the full lace cardstock and select cut. As long as you haven't unloaded the mat, it'll cut the full design exactly, including the section you've highlighted with marker.

A closer look at some details...
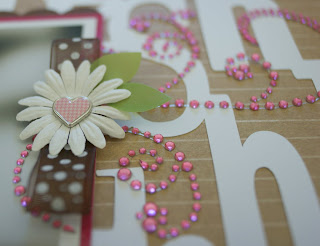
The tickets are from Tim Holtz's collection!!

For my entry...I made my own Lace Cardstock incorporating the title into the design...and then used the Cricut Markers to highlight the title before I cut it out! I used the following cricut cartridges: George and Basic Shapes (for the hearts and some of the letters), Printing Press (more letters) and Storybook (scallop rectangle).

To make the lace cardstock I used my gypsy to lay out the design, welding all the letters together. (It uses up a lot of memory to do this so it takes a little while to compile before cutting.) I saved the completed page as one design. Then, I opened the design again and deleted all the letters that weren't part of the title.

I then did a 'save as' and made this a separate file. This is the file I used first with the cricut markers ONLY...don't cut this version. When the markers finish, don't unload the mat, just replace the blade housing exactly where it is (Tip: I place a small piece of paper, like a post it note, under the marker tip when I'm taking out the marker just in case I drop it on my paper! I don't want the marker to mark up my good paper.)...once the blade housing is in place, on the gypsy select 'return to design'. From here you can open the second file, the one with the full lace cardstock and select cut. As long as you haven't unloaded the mat, it'll cut the full design exactly, including the section you've highlighted with marker.

A closer look at some details...

The tickets are from Tim Holtz's collection!!

Thanks for looking at my latest creation!
Saturday, October 9, 2010
Christmas Tags for Tag Swap!
Here are the tags I made for the Tag Swap on the Cricut Circle message board. You needed to make 5 tags for each swap group that you sign up for. I signed up for 2 groups so I'll be getting 10 different tags back! (Click on the pictures to see them larger!)

For the penguin tag I used: Very Merry Tags for the Ho Ho Ho, Joys of the Season for the penquin and the santa hat, and Create a Critter for the scarf (it's from the reindeer tag, just flipped). I used my gypsy to weld all the pieces together first to make the white shadow background and then layered the images on the background. For the Ho Ho Ho I used the cricut markers to outline the letters first before cutting them.


For the penguin tag I used: Very Merry Tags for the Ho Ho Ho, Joys of the Season for the penquin and the santa hat, and Create a Critter for the scarf (it's from the reindeer tag, just flipped). I used my gypsy to weld all the pieces together first to make the white shadow background and then layered the images on the background. For the Ho Ho Ho I used the cricut markers to outline the letters first before cutting them.


For the reindeer tag I used: Create A Critter for the reindeer and Winter Frolic for the trees. Just like with the penguin tag, I welded the shadow pieces together to create the background layer...which I wanted to be white since it's a tag, there's lots of space to write on the back! I used my iRock to add the metal balls and star gems to the trees.


Thanks for looking at my latest creations!


Thanks for looking at my latest creations!

Subscribe to:
Posts (Atom)


